Blog

The Science of Chocolate Tempering: Achieving the Perfect Gloss and Snap
Category : Food Stories, Recipes |
Posted : Feb 29, 2024
If you’ve ever had a chocolate bar with that perfect snap and glossy finish, then you’ve experienced tempering done well. But did you know the science behind the process of tempering chocolate? Aspiring home chefs and gourmet food consumers alike should be aware of how precise temperatures, cooling rates, and agitation work together to create that highly sought-after texture and shine in both dark and white chocolates. Read on to discover the secrets of proper tempering — from melting techniques to storage methods — so you can impress your friends by making impeccable bites of melted bliss at home.
Overview of Chocolate Tempering - What is it & why is it important
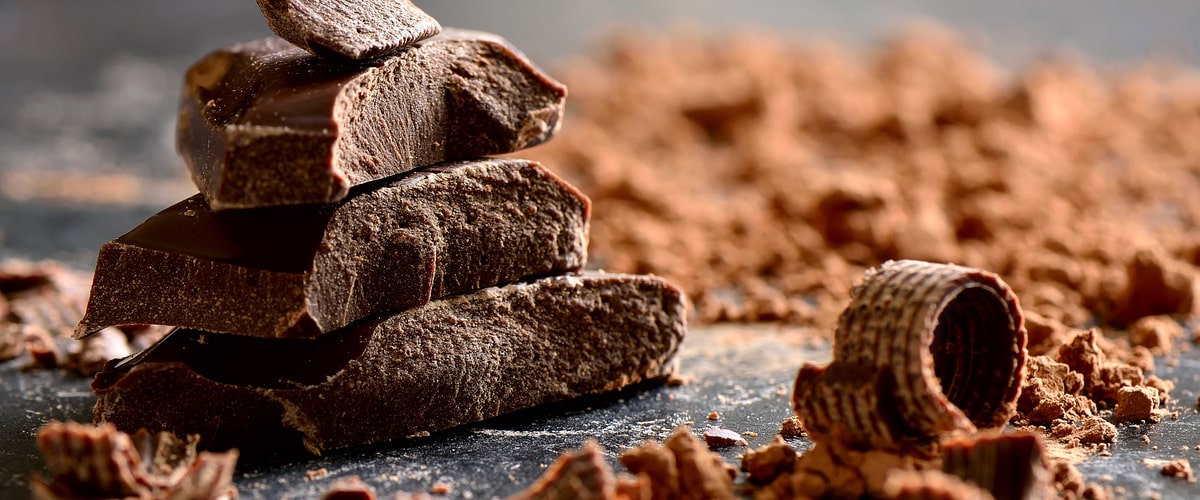
Chocolate tempering is a crucial step in chocolate making that can elevate your homemade chocolaty treats to the next level. But what exactly is it and why is it so important? In short, tempering refers to the process of heating and cooling chocolate in a precise way in order to stabilize its fats and sugars and achieve that perfect, shiny finish. Without tempering, your chocolate may become grainy or dull-looking, and it may even melt at room temperature. But if you take the time to properly temper your chocolate, your treats will have a smooth and glossy appearance, a satisfying snap, and a longer shelf life. So if you're serious about making high-quality chocolate desserts, mastering the art of tempering is an absolute must.
What are the Science Behind Chocolate Tempering
Chocolate tempering might seem like a dark art to the uninitiated, but it is actually a well-understood scientific process. It involves carefully heating and cooling the chocolate until it reaches the ideal state for dipping, molding, or coating. Proper tempering creates a glossy shine, a satisfying snap, and a smooth mouthfeel. The science behind tempering lies in the crystal structure of the cocoa butter, which can form several different types of crystals depending on how it is cooled. By controlling the temperature and stirring the chocolate, a skilled chocolatier can encourage the formation of the desirable beta crystals and prevent the unstable alpha crystals from forming. This allows the chocolate to set up properly and create the perfect texture and flavor. So the next time you savor a rich, velvety piece of chocolate, remember that there's a lot of science behind that delicious treat!
Understanding the Different Temperatures & How They Influence Texture & Flavor
Understanding the impact of temperature on the texture and flavor of food can take your culinary skills to a whole new level. Temperature changes alter the molecular structure of the food, resulting in changes in texture and flavor. For instance, a low temperature and slow cooking can break down connective tissues in meat, resulting in a tender and juicy texture. In contrast, high temperature and quick cooking can cause proteins to denature quickly, leading to a tougher texture. Temperature plays a vital role in flavor development, as individual compounds in food release and interact with each other differently at different temperatures. Therefore, it is essential to understand the science behind temperature and cooking to unlock the full potential of your ingredients. Embrace the magic of temperature, and you'll watch your dishes transform into culinary masterpieces in no time.
The Challenges of Temperamental Chocolates and How to Overcome Them
Chocolates can be quite temperamental - one day they’re perfect, the other day they’re just not right. But don’t let this challenge discourage you from working with chocolate! As a self-professed chocolate enthusiast, I am confident in saying that there are ways to overcome these hurdles and produce consistently amazing chocolates. The trick is in understanding the science behind the tempering process, and knowing how to troubleshoot when things start to go awry. Whether it's controlling temperature or incorporating the right type of cocoa butter, the devil is in the details - but with a bit of practice and experimentation, you'll soon be on your way to mastering the art of chocolate making. So go ahead, give it a shot! The rewards of delicious, perfectly-tempered chocolates are absolutely worth it.
Tips for Achieving Perfect Gloss & Snap Every Time
Attention all photographers and food stylists! Are you tired of spending countless hours trying to achieve the perfect gloss and snap on your food photography? Look no further. I am here to provide you with tips that are guaranteed to help you achieve that flawless look every time. By using a few simple techniques such as lighting, proper camera settings, and post-processing, you can enhance the gloss and snap of your photos. Trust me, I have years of experience working in the industry and I am confident that these tips will take your food photography to the next level. So, let's get started on perfecting that perfect shot!
Different Methods of Chocolate Tempering & Their Benefits
Chocolate can be a finicky ingredient, but when you have it in the perfect state, it can work wonders in your recipes. That's where tempering comes in, which is the process of heating and cooling chocolate to specific temperatures in order to create a consistent, glossy texture while also preventing it from becoming brittle and chalky. There are a few different methods to temper chocolate, from seeding to tabling and even using a microwave. Each method has its own benefits, but the end result is the same: a velvety, smooth chocolate that is sure to impress any dessert connoisseur. With a little patience and practice, chocolate tempering can become a valuable skill in any baker's arsenal.
Marky's Step-by-step Guide to the Perfectly Tempered Chocolate
- Start by melting your chocolate in a double boiler set over low heat. Stir regularly until it is completely melted and smooth.
- Remove the melted chocolate from the heat, and cool it to approximately 88°F (31°C). This temperature is referred to as the crystallization point or “seeding” temperature for dark chocolate. For white or milk chocolates, this temperature should be between 84-86°F (29-30°C).
- Once you have achieved the desired temperature, gradually raise it by stirring in small amounts of unmelted chocolate pieces, known as "seeds". As these seeds melt into the tempered chocolate, they will help bring up its overall temperature while also introducing stable beta-crystals to the mix.
- Continue stirring and monitoring the temperature until it reaches 88-90°F (31-32°C) for dark chocolate, or 86-88°F (30-31°C) for white and milk chocolates. It is important that you don’t overheat the chocolate, as this will destroy its temper.
- Once your chocolate has reached the desired temperature, you can begin using it for dipping, coating, or molding! Enjoy your perfectly tempered chocolate creations!
I hope this guide was helpful in teaching you how to achieve perfectly tempered chocolate every time. With a little practice and patience, you'll be well on your way to creating delectable desserts in no time. Happy tempering!
As you can see, chocolate tempering is an art form that requires practice and care. It's not something everyone can do, yet it's surprisingly accessible for a beginner sweets maker once you understand the fundamentals and master the techniques. You just need to be mindful of temperatures and consistency throughout the process, while giving your confections time to cool properly before using them. With patience and careful attention, creating a flawless temper will become second nature in no time and any chocolatier will be able to turn out stunning samples of glossy snaps with each batch. Give it a try yourself! Who knows, perhaps you may even find such a deep satisfaction from being able to perfectly temper chocolate that you can call it your new favorite hobby!